Frequently Asked Questions
How can one make a robot rotate to a certain angle using navX-Sensor technology?
Automatically rotating a robot to an angle using navX-MXP can be used to rotate a robot quickly and accurately to a known angle, as long as the robot drive system provides independent Z-axis rotation (the capability to “spin on a dime”). This same technique can be used to help a robot drive in a straight line.
This example code below will automatically rotate the robot to one of four angles (0, 90, 180 and 270 degrees) whenever the corresponding “rotate to preset angle” button is pressed. This rotation can occur not only when the robot is still, but also when the robot is driving. When using field-oriented control, this will cause the robot to drive in a straight line, in whatever direction is selected.
This example also includes a feature allowing the driver to “reset” the “yaw” angle. When the reset occurs, the new gyro angle will be 0 degrees. This can be useful in cases when the gyro drifts, which doesn’t typically happen during a FRC match, but can occur during long practice sessions.
The PID Controller coefficients defined in the example code will need to be tuned for your drive system.
For more details on this approach, please visit Chief Delphi, including this helpful post.
Full Java Source code on GitHub


Full LabVIEW Source code on Github
This example code below will automatically rotate the robot to one of four angles (0, 90, 180 and 270 degrees) whenever the corresponding “rotate to preset angle” button is pressed. This rotation can occur not only when the robot is still, but also when the robot is driving. When using field-oriented control, this will cause the robot to drive in a straight line, in whatever direction is selected.
This example also includes a feature allowing the driver to “reset” the “yaw” angle. When the reset occurs, the new gyro angle will be 0 degrees. This can be useful in cases when the gyro drifts, which doesn’t typically happen during a FRC match, but can occur during long practice sessions.
The PID Controller coefficients defined in the example code will need to be tuned for your drive system.
For more details on this approach, please visit Chief Delphi, including this helpful post.
FRC C++ Example
Full C++ source code on GitHubFRC Java Example
Full Java Source code on GitHub
FRC LabView Example
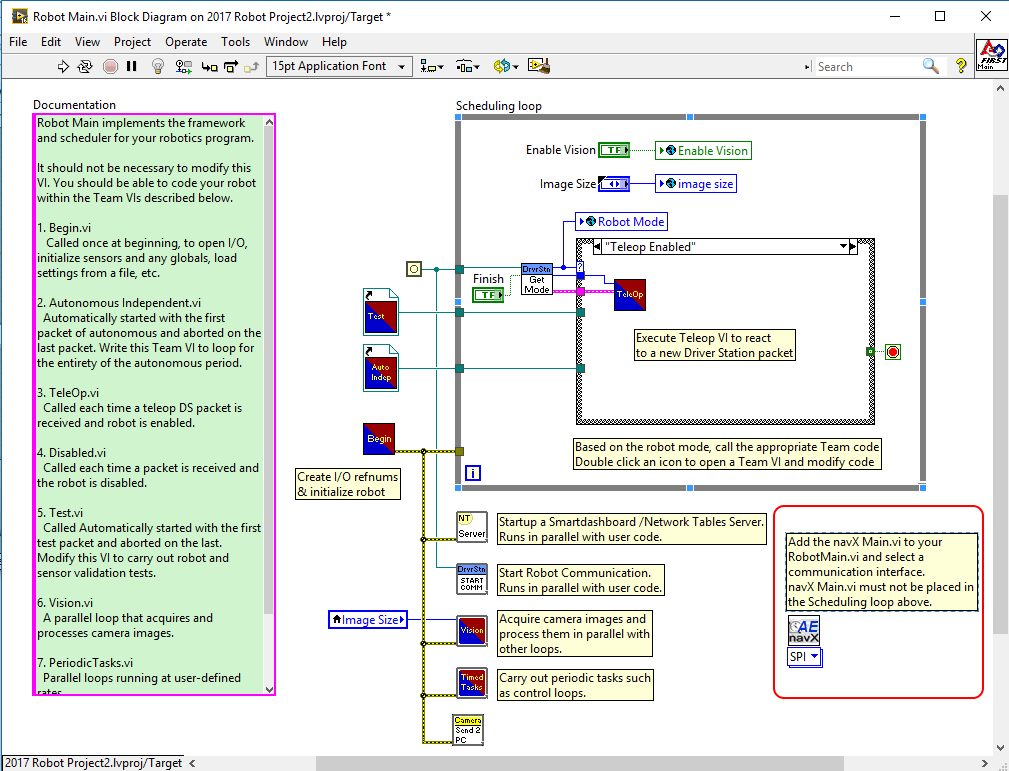
The navX-MXP Rotate to Angle LabView example shows how to make small modifications to the LabView “FRC RoboRIO Robot Project” using the “Mecanum Robot” configuration to rotate the robot to a given angle.RobotMain.vi
Place the NavX main vi on the block diagram and set it up to your needs. The default sample rate is 50Hz. You may need to process faster for your situation. For the SPI, I2C and USB connections the max sample rate is 200Hz.
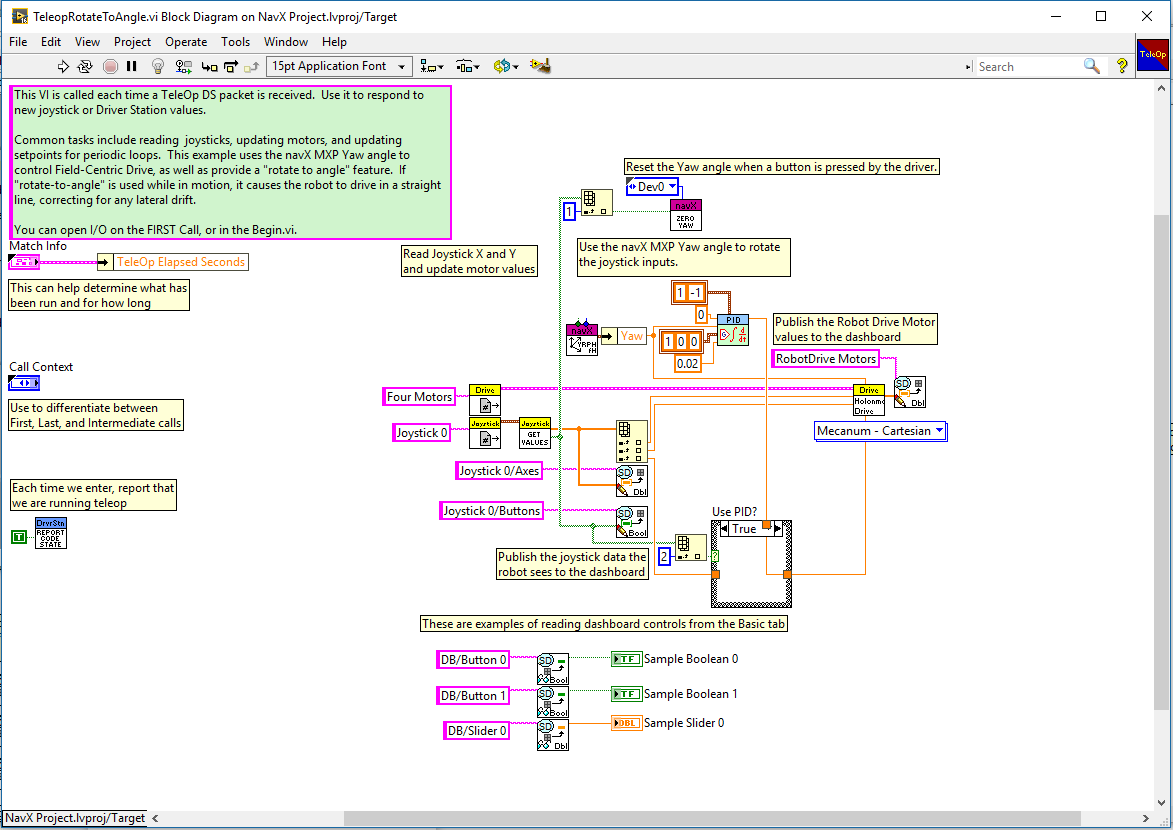
Teleop.vi
The Teleop.vi is modified to feed the current navX-MXP “Yaw” angle reading to the Holonomic Drive VI, which rotates the joystick X/Y coordinates by the gyro angle (and thus implements FieldCentric drive control). Additionally, if a driver joystick button is pressed, the navX-MXP “Yaw” angle is reset to zero. This example also includes a “Rotate to angle” feature, using a PID controller; note that if “Rotate to Angle is used while in motion, it causes the robot to drive in a straight line, correcting for lateral drift.
Full LabVIEW Source code on Github
Last Updated 8 years ago